Introduction
There’s something deeply comforting about the smell of fresh bread baking in the kitchen. For anyone avoiding gluten, though, homemade bread can feel intimidating. Many gluten-free loaves turn out dense, dry, or crumbly — especially in a bread machine.
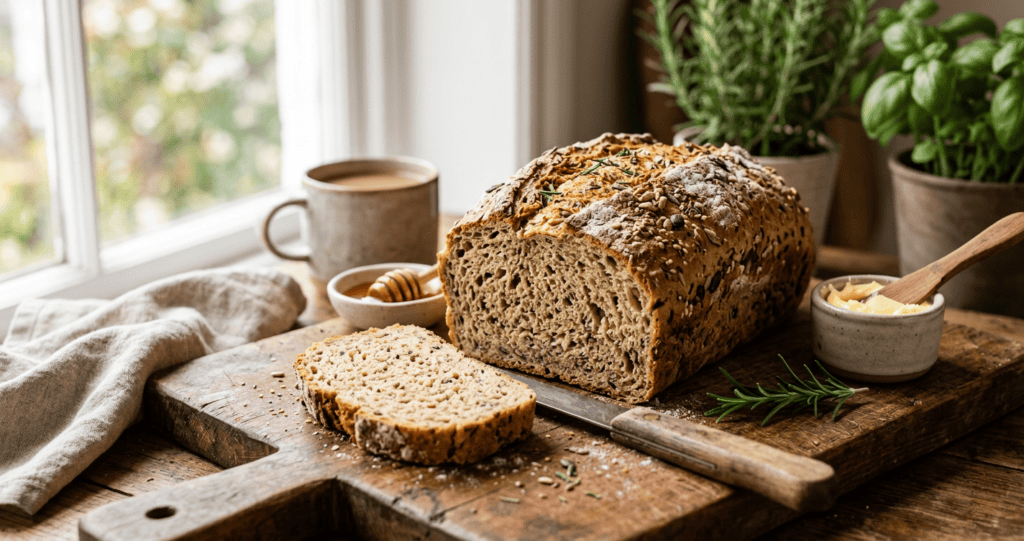
This gluten free bread for bread maker recipe changes that.
After testing countless combinations of flours and hydration levels, I landed on a loaf that’s soft, sliceable, and dependable. It has a tender crumb, a golden crust, and enough structure for sandwiches, toast, and even French toast the next day.
What makes this version special is the balance of ingredients. A blend of gluten-free flour, xanthan gum, eggs, and a touch of apple cider vinegar creates the elasticity and rise that gluten-free breads often lack. And because the bread maker does the mixing, kneading, and baking, it’s wonderfully hands-off.
This recipe is perfect for:
- Busy weeknights when you want fresh bread with minimal effort
- Meal prep for sandwiches and toast
- Families managing gluten intolerance or celiac disease
- Anyone new to gluten-free baking and looking for a reliable bread machine loaf
Why You’ll Love This Recipe
- Bread-machine friendly: designed specifically for the gluten-free setting.
- Soft and fluffy texture: not dense or gummy.
- Simple ingredients: uses pantry staples and a gluten-free flour blend.
- Great for sandwiches and toast: slices cleanly and holds together well.
- Reliable rise: eggs, yeast, and vinegar help create lift and structure.
- Hands-off preparation: the bread maker does most of the work.
- Freezer-friendly: perfect for make-ahead meal prep.
- Better than store-bought: fresher, softer, and more flavorful.
Quick Recipe Information
| Detail | Value |
|---|---|
| Prep Time | 10 minutes |
| Cook Time | 2 hours 20 minutes |
| Total Time | 2 hours 30 minutes |
| Servings | 10 slices |
| Calories | 190 per slice |
| Cuisine | American |
| Course | Bread |
| Difficulty | Easy |
Ingredients
Main Ingredients
- 1 1/2 cups warm water (about 110°F / 43°C)
- 3 large eggs, room temperature
- 1/4 cup olive oil or melted butter
- 1 tablespoon apple cider vinegar
- 3 cups gluten-free all-purpose flour blend (with xanthan gum included)
- 1 tablespoon sugar or honey
- 1 teaspoon salt
- 2 1/4 teaspoons instant yeast (1 standard packet)
Optional Ingredients
- 1 tablespoon psyllium husk powder for extra softness
- 1 tablespoon milk powder for richer flavor
- 1 tablespoon mixed seeds (sesame, flax, sunflower) for topping
- 1 teaspoon garlic powder or herbs for a savory loaf
Ingredient Notes
- Gluten-free flour blend: Use a high-quality blend designed for baking. If your blend does not contain xanthan gum, add 1 teaspoon separately.
- Eggs: They provide structure, moisture, and help the loaf rise properly.
- Apple cider vinegar: This reacts with the yeast and improves texture and rise.
- Instant yeast: It can be added directly with the dry ingredients; no proofing needed.
- Psyllium husk (optional): Helps mimic gluten’s elasticity and keeps the bread softer longer.
Kitchen Equipment Needed
- Bread maker with a gluten-free cycle
- Measuring cups and spoons
- Kitchen scale (optional, but helpful for accuracy)
- Rubber spatula
- Cooling rack
Step-by-Step Instructions
Step 1: Add the wet ingredients
Pour the warm water into the bread maker pan, then add the eggs, olive oil, and apple cider vinegar.
Why it matters: Gluten-free doughs are more batter-like than traditional doughs, so starting with liquids helps the machine mix evenly.
Visual cue: The liquid mixture should look smooth and slightly frothy after the eggs are added.
Common mistake: Using water that is too hot can kill the yeast. Aim for warm, not hot.
Step 2: Add the dry ingredients
Sprinkle the gluten-free flour blend evenly over the liquids. Add the sugar, salt, and psyllium husk powder if using.
Why it matters: Layering the ingredients helps the bread maker distribute them properly during mixing.
Common mistake: Letting salt touch the yeast directly can slow yeast activity, so keep them separated initially.
Step 3: Add the yeast
Make a small well in the center of the flour and add the instant yeast.
Why it matters: Keeping the yeast dry until mixing begins helps ensure a strong rise.
Visual cue: The yeast should sit in a dry pocket of flour, not directly in the liquid.
Step 4: Start the bread maker
Place the pan in the machine, select the gluten-free cycle, choose a light or medium crust, and start the machine.
Why it matters: Gluten-free cycles are designed for the unique mixing and rising needs of gluten-free doughs.
Common mistake: Using a standard bread cycle can overmix or under-rise gluten-free dough.
Step 5: Check the dough during mixing
After about 5–10 minutes of mixing, open the lid briefly and scrape down the sides with a spatula if needed.
Why it matters: Gluten-free dough is thick and sticky, so flour can sometimes cling to the corners of the pan.
Visual cue: The dough should resemble a thick cake batter, not a firm kneaded dough.
Step 6: Let the machine finish
Allow the bread maker to complete the cycle without opening the lid during rising or baking.
Why it matters: Opening the lid can cause the loaf to collapse from a sudden temperature change.
Visual cue: The finished loaf should be golden brown and sound slightly hollow when tapped.
Step 7: Cool completely
Remove the loaf from the pan immediately and place it on a cooling rack. Let it cool for at least 1 hour before slicing.
Why it matters: Gluten-free bread continues to set as it cools. Cutting too soon can make it gummy.
Common mistake: Slicing warm bread before the crumb has stabilized.
Expert Tips for Success
- Use room-temperature eggs: they blend more smoothly and help with rise.
- Measure flour carefully: too much flour makes the loaf dense. Spoon flour into the cup and level it off.
- Don’t skip the vinegar: it improves texture and helps activate the yeast.
- Check your yeast freshness: old yeast is a common cause of flat loaves.
- Use the gluten-free cycle: it’s specifically timed for gluten-free doughs.
- Scrape the pan once during mixing: this prevents dry flour pockets.
- Cool completely before slicing: patience gives you cleaner slices.
- Store slices in the freezer: gluten-free bread stays freshest when frozen.
- Add psyllium husk for bakery-style texture: it improves elasticity and softness.
- Experiment with flour blends: different brands absorb moisture differently, so small adjustments may be needed.
- For a softer crust, brush with melted butter: do this immediately after baking.
Recipe Variations
Vegetarian Version
This recipe is already vegetarian as written.
Vegan Version
- Replace eggs with 3 flax eggs (3 tablespoons ground flaxseed + 9 tablespoons water).
- Use olive oil instead of butter.
- Choose a vegan gluten-free flour blend.
Gluten-Free Version
This recipe is fully gluten-free. Always verify that your flour blend, yeast, and other ingredients are certified gluten-free to avoid cross-contamination.
Low-Calorie Version
- Reduce oil to 2 tablespoons.
- Use egg whites instead of whole eggs (6 egg whites total).
- Choose a lighter gluten-free flour blend with fewer starches.
Spicy Version
- Add 1 teaspoon chili flakes and 1 teaspoon garlic powder.
- Mix in 1/2 cup shredded pepper jack cheese for extra flavor.
What to Serve With Gluten Free Bread for Bread Maker Recipe
Breakfast Ideas
- Butter and jam
- Avocado toast
- Scrambled eggs
- Greek yogurt and fruit
Lunch and Dinner Pairings
- Soup (tomato, lentil, or chicken noodle)
- Fresh salads
- Sandwiches and paninis
- Cheese and charcuterie boards
Drinks
- Coffee or tea
- Fresh orange juice
- Herbal iced tea
Desserts
- Fruit crisp
- Chocolate mousse
- Gluten-free brownies
Storage Instructions
Refrigerator
Store the cooled loaf in an airtight container or bag for up to 4 days. Refrigeration can dry bread slightly, so toast slices before serving.
Freezer
Slice the loaf and freeze slices in a zip-top bag for up to 3 months. Place parchment between slices for easy separation.
Reheating Methods
- Toaster: Toast frozen or refrigerated slices directly until warm and crisp.
- Oven: Wrap the loaf in foil and warm at 325°F (165°C) for 10–15 minutes.
- Microwave: Heat a slice for 10–15 seconds for a quick softening.
Nutritional Information
Approximate values per slice (1/10 of loaf).
| Nutrient | Amount |
|---|---|
| Calories | 190 |
| Carbohydrates | 26 g |
| Protein | 5 g |
| Fat | 7 g |
| Saturated Fat | 1.5 g |
| Fiber | 2 g |
| Sugar | 2 g |
| Sodium | 220 mg |
Common Mistakes to Avoid
- Using water that is too hot or too cold.
- Measuring flour inaccurately.
- Skipping xanthan gum when your flour blend doesn’t include it.
- Using a regular bread cycle instead of gluten-free.
- Opening the lid during rising or baking.
- Cutting the bread before it cools.
- Using expired yeast.
- Adding too much flour, resulting in a dense loaf.
- Forgetting to scrape down the pan during mixing.
- Storing the bread uncovered, which dries it out quickly.
Frequently Asked Questions
Can I make this recipe without eggs?
Yes. Replace the 3 eggs with 3 flax eggs (3 tablespoons ground flaxseed mixed with 9 tablespoons water). The loaf will be slightly denser but still delicious.
What is the best gluten-free flour blend for bread machines?
A blend designed for baking and containing rice flour, tapioca starch, potato starch, and xanthan gum works best. Brands like King Arthur and Bob’s Red Mill are reliable choices.
Why is my gluten-free bread dense?
Dense bread is usually caused by too much flour, expired yeast, or not using the gluten-free cycle. Accurate measuring and fresh yeast make a big difference.
Can I use active dry yeast instead of instant yeast?
Yes, but dissolve it in the warm water with the sugar for 5 minutes before adding it to the bread maker.
Do I need xanthan gum?
If your flour blend already includes xanthan gum, you do not need extra. If it doesn’t, add 1 teaspoon to improve structure and texture.
How do I keep gluten-free bread soft?
Use psyllium husk, avoid overbaking, and store the bread in an airtight container. Freezing slices also helps preserve softness.
Can I add seeds or nuts?
Absolutely. Add up to 1/2 cup of seeds or chopped nuts during the last mixing phase to avoid weighing down the dough.
Why did my loaf collapse?
Opening the lid during baking, too much liquid, or overproofing can cause collapse. Keep the lid closed and measure ingredients carefully.
Can I make this recipe by hand instead of in a bread maker?
Yes. Mix the ingredients into a thick batter, let it rise once, then bake in a loaf pan at 350°F (175°C) for 45–55 minutes.
How long does gluten-free bread last?
At room temperature, it’s best within 2 days. Refrigerated, it lasts about 4 days, and frozen slices keep well for up to 3 months.
Final Thoughts
Making gluten-free bread at home doesn’t have to be frustrating. With the right balance of ingredients and a bread maker doing the heavy lifting, you can enjoy a loaf that’s soft, flavorful, and truly satisfying.
This gluten free bread for bread maker recipe has become my go-to because it’s reliable, easy, and versatile enough for everything from morning toast to hearty sandwiches. Once you try it, you may never go back to expensive store-bought gluten-free bread again.
Happy baking!